 Craftsmith Guild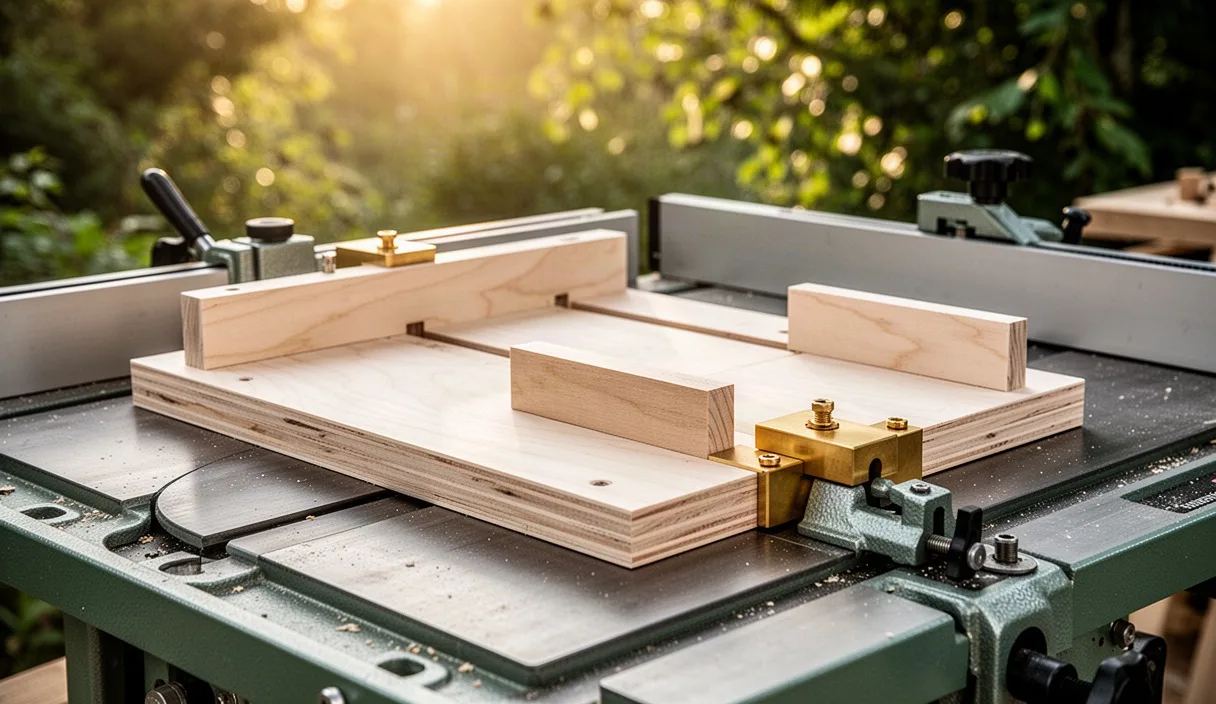
A cramped basement shop in the dead of winter brings its own set of challenges. Between the damp cold creeping through fieldstone walls and the limited swing around a cast iron contractor saw, you cannot afford wasted cuts or clumsy setups. The factory miter gauge that arrived in the crate with your saw often rattles inside the machined slots, leaving small gaps in miters and ragged crosscuts on cabinet panels. A dedicated crosscut sled support those inaccuracies by carrying your workpiece over the table on a flat, dedicated carriage, eliminating table friction and blade chatter in a single stroke.
Building a dependable sled does not demand exotic tooling or expensive aluminum extrusions. With half a sheet of multi-ply plywood, scraps of kiln-dried hardwood from the cutoff bin, and a methodical approach to squareness, you can build an accurate, rigid sled in an afternoon. This sled design keeps dimensions modest, roughly 24 inches wide by 18 inches deep, so it hangs neatly on an open stud wall between jobs without crowding narrow gangways.
Selecting Flat Baltic Birch Sheets for Dimensional Stability
The foundation of any crosscut sled is its deck. Standard construction plywood from the local builders yard will not do; its inner plies are loaded with voids, and the outer veneers buckle the moment relative humidity changes in late spring. Multi-ply Baltic birch or European birch, bonded with exterior-grade resin, remains the gold standard for shop fixtures. An 18 mm (nominal 3/4-inch) sheet containing 13 uniform plies provides the necessary dead-flat surface and resists the sagging that ruins cut accuracy over time.
When selecting your material at the timber yard, avoid sheets stacked upright on their edges, as they tend to take on a gradual bow. Pull a sheet from the center of a flat pack. Lay a reliable 24-inch precision straightedge diagonally across the face of the blank. If you can slide a 0.004-inch feeler gauge beneath the rule at any point, leave that sheet behind and inspect the next one. For smaller benchtop or contractor saws with shallow tables, a deck sized to 24 inches wide by 18 inches deep keeps weight down to roughly 14 pounds, sparing your lower back during repetitive cuts.
| Material Type | Nominal Plies (18 mm) | Core Uniformity | Seasonal Movement |
|---|---|---|---|
| Baltic Birch | 13 plies | No voids, solid birch throughout | Minimal across four seasons |
| Cabinet-Grade Birch (Domestic) | 7 plies | Softwood inner plies, minor gaps | Moderate cross-grain expansion |
| Sheathing Plywood (CDX) | 5 plies | Frequent open pockets and overlaps | Severe warping and twisting |
| Medium-Density Fiberboard (MDF) | None (homogeneous) | Uniform density, zero grain | Swells permanently with moisture |
Cut the deck blank cleanly using a tracksaw or a well-tuned circular saw against a straight guide. Keep the factory edge oriented to the rear fence line. Sand the underside of the deck lightly with 220-grit paper to knock down any stray fibers, but do not round over the corners, as sharp, true edges make registration against the rip fence straightforward during the initial assembly steps.
Milling Hardwood Runners for Snug Miter Slot Gliding
A sled is only as true as its runners. Standard miter gauge slots measure 3/4 inch wide by 3/8 inch deep, but factory tolerances vary by several thousandths of an inch between manufacturers. Commercial steel or aluminum runners are rigid, but dense hardwood runners allow you to dial in an exact friction fit using nothing more than a hand plane and cabinet scraper. Quartersawn hard maple, hornbeam, or beech are ideal choices because their seasonal expansion moves along the thickness rather than the critical width of the runner.
Rip your runner blanks slightly proud at 13/16 inch wide by 7/16 inch thick. Joint one face, pass them through the thickness planer until the depth measures exactly 5/16 inch, leaving 1/16 inch of clearance at the bottom of the table slot. To fit the width, take fine shavings off the edge using a No. 4 smoothing plane. Test the fit frequently in your saw's slots. The runner should drop in under its own weight and slide from front to back without binding or rocking side to side. Any perceptible lateral play will double over the length of your cut.
To mount the runners to the plywood deck without measuring errors, use the table saw top itself as your alignment jig:
- Drop clean steel washers or pennies into the bottoms of both miter slots until the top surfaces of the hardwood runners sit roughly 1/16 inch above the cast iron surface.
- Run three nickel-sized drops of fast-setting cyanoacrylate glue, or thin strips of heavy-duty double-sided cloth tape, spaced evenly along the top face of each runner.
- Set the table saw rip fence to hold the plywood deck parallel to the blade, leaving roughly 4 inches of overhang on the left side.
- Lower the deck firmly onto the exposed runners, pressing straight down against the fence for 60 seconds without sliding.
- Slide the sled forward carefully, flip it upside down on your bench, and drill countersunk pilot holes every 5 inches. Drive 1-inch #6 steel wood screws through the runners into the plywood deck.
Attaching the Front and Rear Safety Fences Securely
The fences serve two duties: they hold the sled together after the saw blade splits the deck into two halves, and the rear fence (closest to the user) serves as the primary square reference for all future cuts. Deflection here will ruin joinery, so the rear fence must be exceptionally stiff. Laminate two strips of 18 mm Baltic birch or face-glue two clear pieces of 8/4 quartersawn ash to yield a finished beam measuring at least 2-1/2 inches thick by 3-1/2 inches high.
The front fence, positioned across the far end of the sled away from the operator, needs less mass because it experiences no cutting pressure. A single piece of 18 mm birch ply, 2-1/2 inches tall, keeps the front of the sled intact. Fasten this front fence first using wood glue and countersunk 1-5/8 inch screws driven through the bottom of the sled deck. Make sure screws stay at least 2 inches away from the center where the blade will pass.
For the rear fence, mill the bottom edge dead straight and square to its faces on your jointer. Do not glue this fence down yet. The rear fence requires precise adjustment before it is locked in place. Secure the left side of the fence to the sled base with a single 2-inch lag screw or heavy wood screw driven from underneath through a pre-drilled pilot hole. This screw acts as a pivot axis. On the far right end, clamp the fence down to the deck with a heavy C-clamp, leaving it ready for fine alignment.
Cutting the Zero Clearance Kerf Line Through the Deck
A zero clearance kerf gives absolute support to wood fibers directly beside the blade teeth, preventing tear-out on delicate veneer and cross-grain cuts. It also gives you an instant visual line for aligning pencil marks on your workpieces. Making this first cut requires care because the blade will emerge from beneath the solid plywood deck while you cannot see it.
Lower the table saw arbor completely until the blade sits beneath the table surface. Slide your assembled sled over the blade until the front edge of the carriage sits roughly 2 inches past the blade center. Clamp a stop block to your saw table behind the sled so it cannot kick backward. Plug the saw in, start the motor, and slowly rotate the arbor handwheel to raise the spinning blade upward through the birch deck. Stop raising the blade when it clears the top surface by 1/4 inch.
Turn off the saw, wait for the arbor to stop spinning entirely, and unclamp the carriage. Restart the machine and advance the sled forward to push the kerf through the deck until the blade grazes the bottom of the front fence. Never cut entirely through the front or rear structural fences. Stop the cut, shut off the power, and retract the sled. You now have a reference kerf that matches your specific blade kerf down to the thousandth of an inch.
Applying the Five Cut Procedure to Square the Back Fence
A standard machinist square cannot match the compounding accuracy needed across an 18-inch crosscut. The five-cut method isolates and multiplies any fence angular error by a factor of four, allowing you to square the fence using a standard set of digital calipers. For this procedure, use a flat scrap piece of MDF or plywood roughly 16 inches square.
Number the edges of your test panel sequentially from 1 to 4 in a clockwise direction. Perform the following cuts in sequence:
- Place edge 4 against the rear sled fence, and trim off edge 1.
- Rotate the panel 90 degrees clockwise so fresh cut 1 rests against the fence, and trim edge 2.
- Rotate again so cut 2 rests against the fence, and trim edge 3.
- Rotate a third time so cut 3 rests against the fence, and trim edge 4.
- Rotate a fourth time so edge 4 rests against the fence. Make a final cut about 1/2 inch wide, slicing off a thin strip across edge 1. Mark the front end and the back end of this strip as it sits in the sled.
Measure the width of the thin offcut strip at the front (dimension A) and the back (dimension B) using digital calipers. Measure the overall length of the cut strip (dimension L). The equation to determine your fence error per inch of travel is straightforward: subtract dimension B from dimension A, then divide that number by 4 times dimension L. For example, if dimension A is 0.512 inches, dimension B is 0.496 inches, and length L is 16 inches, the math runs as follows:
(0.512 - 0.496) / (4 * 16) = 0.016 / 64 = 0.00025 inches of error per inch.
Multiply this error per inch by the distance from your pivot screw to the adjustment clamp on the right side of the fence. If that distance is 20 inches, the fence must move 0.005 inches (0.00025 * 20). If dimension A was larger than dimension B, move the fence backward; if smaller, shift it forward. Place a 0.005-inch feeler gauge against a clamped stop block to calibrate the fence movement precisely. Once adjusted, drive four permanent 2-inch screws up through the bottom of the sled to lock the rear fence solidly in place.
Adding Safety Stops and Clear Chip Deflection Guards
A crosscut sled makes table saw operation far more predictable, but it introduces one distinct hazard: the blade exits the back of the sled fence directly in line with your hands. When pushing the sled through a cut, your thumbs naturally rest against the rear fence. Without a physical barrier, a momentary lapse in concentration can bring your hand directly into the path of the spinning blade as it breaks through the rear timber.
Glue a heavy hardwood safety block, at least 3 inches wide, 4 inches tall, and 3 inches deep, directly to the operator side of the rear fence, centered over the kerf line. The blade can cut into this block, but it should never pass completely through it. This wooden housing gives your hands a physical boundary that you cannot bypass while pushing the sled forward.
Add a clear chip guard by securing a piece of 1/8-inch thick polycarbonate (Lexan) above the blade path. Fasten it to the top of the rear fence with two knurled brass thumb screws tapped into threaded inserts. This shield deflects flying chips away from your face and prevents you from reaching down toward the blade to clear away offcut blocks while the arbor is spinning.
Finally, mill an adjustable flip-stop block to ride along the top edge of the rear fence. Embed an aluminum T-track along the top surface of the fence, anchored with #4 pan-head screws every 4 inches. A shop-made hardwood stop block with a bottom relief cut prevents sawdust buildup from throwing off repetitive cuts. When cutting workpieces longer than the sled, the stop simply flips upward out of the way without losing your registered setting.
Common Mistakes in Sled Construction
Small layout errors compound quickly across large panels. Watch for these common pitfalls during construction:
- Fastening screws in the cut path: Never run metal fasteners within 2-1/2 inches of the center kerf. A stray steel screw will destroy an expensive carbide-tipped saw blade and send high-speed shards across the shop floor.
- Using dimensioned pine for runners: Softwoods compress under load and swell erratically when the basement heats up or cools down. Stick strictly to close-grained, quartersawn hardwoods or purpose-made synthetic runner stock like UHMW plastic.
- Over-tightening runner screws: Driving screws too aggressively through thin hardwood runners can split the grain or bulge the sides outward, causing the runner to jam inside the miter slot. Always pre-drill with countersink pilot bits.
- Neglecting paste wax: Bare wood sliding against dry cast iron creates unnecessary friction. Buff two thin coats of non-silicone paste wax into the sled bottom and the table surface to ensure effortless, one-handed sliding.
Next Steps in the Workshop
With your sled assembled and verified for square, take an hour to seal the bare Baltic birch. Wipe two coats of boiled linseed oil or shellac across all exposed plywood surfaces, taking care not to coat the bottom face of the runners where oil might soften the wood. Once dry, buff the bottom of the deck and both runners thoroughly with paste wax.
Store the completed sled hung flat against an interior stud wall by boring an 1-inch hanging hole through one corner of the deck. Storing a sled propped up on its end on a concrete floor invites moisture absorption and will twist the runners over a damp winter. Recheck the sled using the five-cut procedure every six months or whenever you adjust the table saw arbor bearings to keep your joinery fitting tight year-round.