 Craftsmith Guild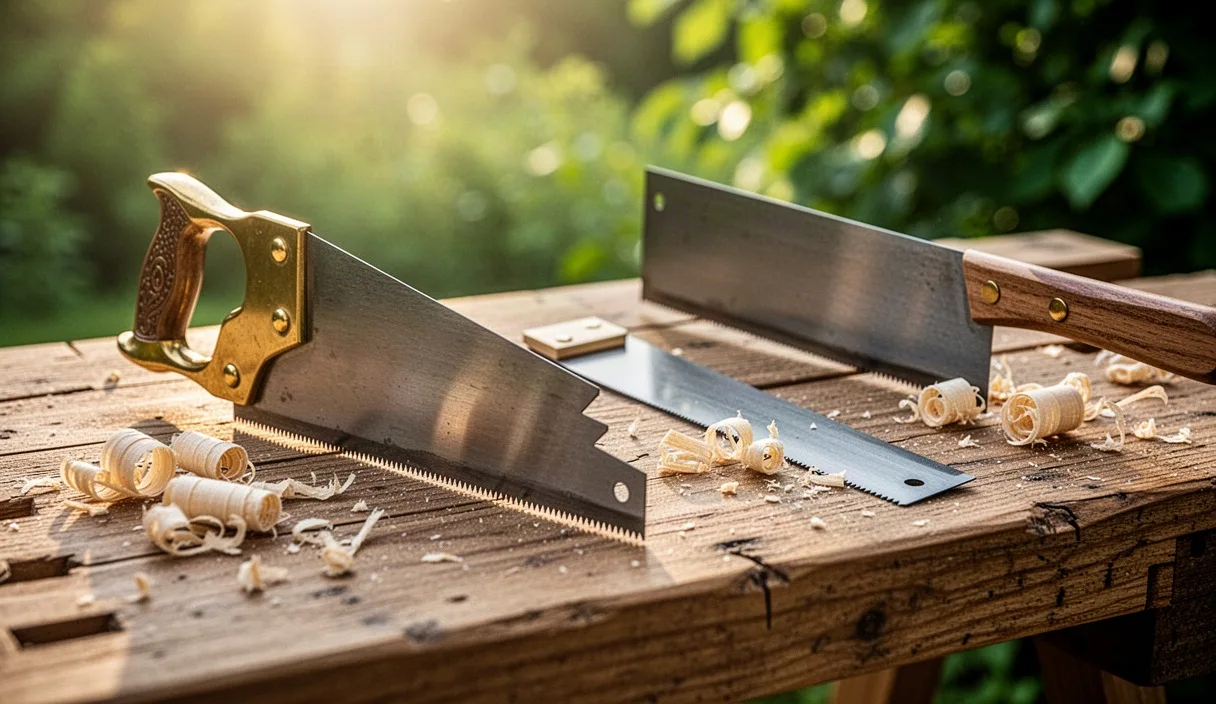
A cold November morning in a Sheffield workshop quickly sorts out which tools earn their keep on the bench. When the frost clings to the slate roofs down by the River Don and the cast-iron vice jaws suck the heat right out of your fingers, reaching for a hand saw is an instinctive choice shaped by how you were taught to cut. For generations of joiners across our towns, that meant a brass-backed tenon saw made from local spring steel, pushed firmly through Scots pine or English oak. Over the past few decades, the arrival of Japanese pull saws into tool chests from Kelham Island to Cornish Street has challenged that old routine, leaving many makers wondering which geometry belongs over their bench hooks.
The choice between Western push saws and Japanese pull saws (known collectively as nokogiri) is not a debate over ancient tradition versus modern novelty. It is a practical decision concerning tooth geometry, blade tension, physical stance, and how you prefer to steer a cut through seasoned timber. Both patterns have survived centuries of workshop life because each solves specific problems of grain direction, workpiece support, and timber thickness. Understanding the mechanical differences allows you to choose the exact tool for your space rather than buying into workshop folklore.
Understanding Pull Stroke Versatility Against Push Stroke Control
The fundamental divide between these two saw families lies in the direction of the cutting action. A Western backsaw or panel saw cuts on the forward push stroke. Because pushing thin sheet metal into dense timber creates compressive force, the blade wants to buckle under pressure. Western toolmakers solved this problem by using thicker plate steel, often between 0.65 mm and 0.9 mm thick for joinery saws, and stiffening the spine with a folded bar of heavy brass or cold-rolled steel. This added mass gives a push saw downward momentum, allowing the weight of the brass back to feed the teeth into the wood without needing excessive muscle behind it.
A Japanese saw operates in reverse, cutting entirely on the draw or pull stroke. Pulling puts the steel blade under tension rather than compression. Because tension naturally straightens metal as you draw it toward yourself, the blade does not require the same plate thickness to resist buckling. A standard ryoba (a double-edged saw with rip teeth on one edge and crosscut on the other) or a spine-backed dozuki can employ spring steel plates as thin as 0.3 mm to 0.5 mm. The pull action yields a cut that starts readily on a pencil line because the cutting teeth engage as the tool approaches your body, right where your eye has the clearest line of sight.
Push stroke control offers distinct advantages when cutting hard timbers like dry European ash or hornbeam. When driving a heavy Western saw forward, your entire torso and shoulder support the stroke, letting you register the flat plate against your thumb knuckle to guide the entry. The stiff blade resists wandering when encountering erratic grain or hidden knots. Conversely, a Japanese pull saw relies on steady, relaxed wrist tracking. If you twist the handle during a pull stroke, the paper-thin blade will bend around the curve, wandering off your line inside the cut where you cannot see it until the joint comes apart.
Kerf Thickness and Its Influence on Waste Removal
The width of the slot left by a saw blade, known as the kerf, directly governs how much timber your arm must convert into sawdust. A standard 250 mm Western dovetail saw with 15 teeth per inch (TPI) and moderate tooth set typically cuts a kerf of roughly 0.75 mm to 0.95 mm. A Japanese dozuki designed for delicate joinery often leaves a kerf of just 0.42 mm. Over a series of ten dovetail sockets in 20 mm thick English walnut, the Western saw removes more than double the volume of wood compared to its Japanese counterpart.
| Saw Pattern | Plate Thickness | Typical Kerf Width | Primary Cutting Stroke | Tooth Configuration |
|---|---|---|---|---|
| Western Dovetail Backsaw | 0.50 mm to 0.65 mm | 0.70 mm to 0.85 mm | Push | Rip filed, triangular teeth |
| Western Tenon Backsaw | 0.70 mm to 0.90 mm | 0.95 mm to 1.20 mm | Push | Crosscut or hybrid filed |
| Japanese Dozuki (backed) | 0.25 mm to 0.38 mm | 0.35 mm to 0.52 mm | Pull | Crosscut knife spurs (kataba) |
| Japanese Ryoba (double edge) | 0.45 mm to 0.60 mm | 0.60 mm to 0.78 mm | Pull | Graduated rip and crosscut edges |
| Japanese Kataba (unbacked) | 0.50 mm to 0.65 mm | 0.70 mm to 0.85 mm | Pull | Deep gullet crosscut or rip |
A thinner kerf requires significantly less physical effort to advance through the timber. This makes Japanese saws remarkably fast on small, detailed components. However, this narrow slot brings an engineering trade-off: sawdust evacuation. Japanese teeth feature knife-like bevels on three faces, severing wood fibers cleanly, but the shallow gullets between fine teeth can choke quickly on wet, resinous timbers like fresh larch or unseasoned sweet chestnut. Western saws feature deeper, open gullets that clear coarse sawdust out of the kerf on every stroke, preventing the blade from binding midway through a deep cut.
Set, the degree to which teeth flare outward from the plane of the blade plate, also differs. Western saws are set with a mechanical plier punch, bending alternate teeth to left and right. This generous set creates clearance so the body of the plate never rubs the sides of the cut. Japanese saws use minimal set, sometimes achieved by gentle hammer swaging or micro-punching. In deep through-cuts on wide boards, this lack of clearance means that any slight release of tension can pinch the blade instantly.
Evaluating Replaceable Blades Versus Resharpenable Spring Steel
Walk into an old hardware shop along the valley and you will see the classic Western saw: high-carbon spring steel hardened to around 50 to 54 on the Rockwell C scale (HRC). This hardness allows the teeth to hold an edge through miles of pine, yet remains soft enough to be reshaped using a standard saw file and a saw set. If you strike a nail or drop a traditional tenon saw onto a flagstone floor, you can joint the blade flat, re-file the tooth profiles, and return it to service in under an hour.
The vast majority of modern Japanese saws sold in the West are impulse-hardened. During manufacturing, an electrical pulse heats the extreme tips of the teeth to over 65 HRC for a fraction of a second before quenching, while the plate beneath remains flexible. These teeth hold a razor-sharp edge roughly three times longer than standard carbon steel when cutting abrasive materials like plywood, MDF, or dense exotic hardwoods. However, impulse-hardened teeth are far too hard to be touched with a traditional saw file; a file will simply skid across the tooth face, ruining the file teeth instantly.
- Traditional Western saws: Infinite sharpening life, modifiable rake and fleam angles to suit specific timber species, resilient against minor tooth damage, higher initial tool cost.
- Impulse-hardened Japanese saws: Lower initial purchase price, exceptional sharpness out of the box, disposable blade system with fast push-button replacement, unable to be reshaped or sharpened at the bench.
- Handmade Japanese saws (Hon-shikomi): Crafted by master blacksmiths without impulse hardening, capable of being sharpened only by an experienced metate-shi (saw doctor) using specialized feather files, exceptionally sensitive to misuse.
If you prefer an investment piece that will outlive your grandchildren and you enjoy maintaining your own cutting edges on dark winter evenings, a Western saw made of quality CS80 or 1095 steel is unmatched. If you want pristine, hair-splitting cuts without spending hours learning the fine art of saw filing, replaceable-blade Japanese saws provide dependable precision at a modest maintenance cost.
Matching Saw Types to Workpiece Heights and Stances
The tools we use are products of the benches we stand before. The Western woodworking bench, typified by English joiners' benches and Continental patterns, stands around waist height, between 850 mm and 950 mm from the floor. This height allows a worker to bring their upper torso directly behind the cut. When driving a push saw, you push your weight from the rear foot through the hips, into the shoulder, down the arm, and straight through the pistol-grip handle into the wood.
Traditional Japanese joinery developed around work supported low to the floor on trestles or held directly on a heavy timber beam called an atodai, with the craftsman kneeling or crouching. In this position, pulling a long, straight rattan-wrapped handle toward the belly uses the strong muscles of the back and lats while keeping the work grounded against the floor. Translating that pull action to a high Western bench can sometimes feel awkward without minor adjustments to how you position the timber.
To cut comfortably with a Japanese saw on a standard English bench, you must secure the work low enough that your forearm does not bend upward into an acute angle at the end of the stroke. Clamping the timber in a tail vice or using a low bench hook keeps your elbow relaxed at an angle of roughly 110 degrees. If the workpiece is held at chest height, pulling toward your neck forces your shoulders up toward your ears, causing rapid fatigue across the trapezius muscles and introducing an involuntary twist to the blade at the completion of each pull.
Body Mechanics for Sawing Square Lines Accurately
Securing a straight, square cut with either saw pattern depends entirely on your stance and sightline rather than brute force. With a Western saw, stand with your feet spaced shoulder-width apart, your forward foot pointing toward the cut line and your rear foot braced at roughly 45 degrees. Align your sawing arm, elbow, wrist, and shoulder in a single vertical plane directly above the cut line. Grip the handle like an open handshake; if your knuckles turn white, you are gripping too tightly, which twists the blade off perpendicular.
Extend your forefinger forward along the cheek of a Western saw handle. This simple finger placement acts as an unconscious pointer, using your body's proprioception to keep the plate perpendicular to the bench. Let the weight of the brass spine do the cutting work. When pushing, apply smooth forward motion without bearing down; when drawing the saw back for the next stroke, lift the blade by a fraction of a millimeter to prevent dragging the tooth tips backwards against the timber.
Cutting accurately with a Japanese saw requires a more squared-off stance. Position your body directly centered on the cut line with your feet parallel or only slightly staggered. Grasp the long wooden handle with both hands, placing your dominant hand near the rear of the handle and your secondary hand closer to the blade. Holding the handle farther back increases your mechanical leverage, making it much easier to detect whether the thin plate is plumb.
- Establish the kerf: For a pull saw, place the rear teeth at the far corner of the timber, using your thumb knuckle as a temporary guide. Pull gently backward with zero downward pressure to score an initial track.
- Track two faces simultaneously: Drop the handle angle low to cut across the top pencil mark first, scoring a line across the full width of the board.
- Work down the near face: Raise the handle slightly and draw the saw downward, using the top cut as a guide track while tracking the line on the face nearest your body.
- Complete the waste block: Level the saw out horizontally, making full-length, steady pulls through the interior core of the wood until the offcut drops away freely.
Storage Habits to Protect Delicate Hardened Saw Teeth
In our damp British climate, unprotected tool steel rusts overnight. The moisture that settles when workshop fires or heaters go out creates pitted surfaces that grab inside the kerf. Japanese saws are especially prone to rust-induced binding because the kerf is so thin; even a light film of oxidation increases friction noticeably. Wipe the steel down with a rag treated with light camellia oil or mineral oil after every session at the bench.
Storage geometry matters as much as rust protection. The delicate teeth on an impulse-hardened saw can shatter like glass if they knock against a cast-iron plane sole, an engineer's square, or another blade inside a drawer. The razor-thin teeth of a dozuki or kataba should never rest directly on a timber shelf where grit can dull the spurs. Keep the plastic edge guard that arrives with the blade, or craft slotted wooden slipcases from scraps of dry tulipwood or pine.
For Western saws, the brass backs require periodic checking. If a brass-backed saw is dropped, the heavy back can shift along the blade, introducing a curve down the tooth line called a belly or a hollow. You can check this by sighting down the teeth like a gun barrel. If the blade is warped, tap the spine gently on a wooden block to reseat the steel plate inside the brass channel until the tooth line runs dead straight from heel to toe. Hang Western saws by their handles on open wall racks where air circulates freely, keeping them away from damp exterior brickwork.
Common Mistakes to Avoid
The most frequent error joiners make when adopting Japanese saws is pushing down on the cut. Accustomed to the downward pressure needed for worn Western saws, woodworkers bear their weight onto the pull stroke. This invariably kinks the blade plate just forward of the handle, bending the thin metal permanently and ruining the tool's tracking. A pull saw needs only the lightest touch; let the sharp bevels draw themselves into the fibers.
Another damaging habit is starting a Western cut by drawing backward repeatedly to create a groove. While common practice, dragging a Western rip tooth backward over a sharp timber corner dulls the delicate tip of the tooth before it has cut a single shaving forward. Instead, place the saw at a shallow angle, rest the blade against your thumb knuckle, and initiate the cut with a light, confident forward stroke right on the waste side of your line.
Woodworkers also struggle when using crosscut saws for ripping operations. Japanese crosscut teeth (with their triple-faceted, knife-like points) will seize, buckle, and break if forced lengthwise down the grain of oak or ash. The long grain fibers get trapped between the small teeth, tearing them free from the plate. Always flip your ryoba to the coarse rip side with graduated triangular teeth when cutting cheek tenons or dividing boards along their length.
Practical Next Steps
If you are deciding which direction to take your workshop joinery, start with an honest assessment of what you build most often. For small box making, miniature casework, and delicate drawer dovetails in timbers under 15 mm thick, purchase an inexpensive 210 mm or 240 mm replaceable-blade dozuki. It will give you clean, paper-thin joints with a short learning curve and minimal setup time.
If your work involves larger furniture carcases, heavy dining tables, architectural carpentry, or native British hardwoods over 25 mm thick, invest in a traditional 250 mm Western tenon saw filed with hybrid or rip teeth. Pair it with a 150 mm extra-slim taper file and a traditional saw set. Learning to file your own saw connects you directly to the tools of the old trade, providing a tool that you can reshape and tune to match the precise timber on your bench for decades to come.